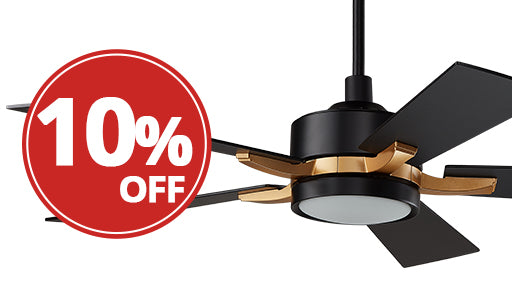
How to Install a Smafan Ceiling Fan
So, you’ve purchased the best ceiling fan for your home, but how do you start enjoying it? Installing your brand-new ceiling fan can seem like a looming task, especially if you have no previous experience in this area. Good news: installing your ceiling fan doesn’t have to be complicated! Each of our Smafan Wifi Ceiling Fans comes with all the necessary installation parts and easy-to-read instructions, so you can install your ceiling fan safely, easily, and without calling an electrician. In this helpful guide, we will break down the installation process for beginners looking to install their ceiling fan.
Tools & Materials
While all our ceiling fans come with the required installation parts, you’ll want to gather a few tools to facilitate this process:
- A step ladder
- A screwdriver
- An external hexagonal wrench
*If you don’t already have one, you will need a ceiling fan box and brace; double-check the weight capacity to ensure it can withstand the weight of your moving ceiling fan.
Safety Tips Before Installation
*To avoid damage, serious injury, or death, comply with the following safety rules:
- Make sure you turn off your power at the circuit breaker before removing or installing any fans or fixtures.
- Double-check that your junction box is compatible with the weight of your ceiling fan.
- Verify your home has the proper wiring and is compatible with the appropriate ceiling fan connections.
- Only use a safe stepladder to reach your ceiling fan; never use any furniture with wheels, such as chairs or side tables.
- Verify that you can easily lift at least 40 pounds. If not, you will have to ask someone to help lift the fan.
- You must thoroughly read all the Warnings & Safety Precautions provided by your ceiling fan manufacturer and found in your installation manual.
Finding the Perfect Spot
When looking for the perfect spot to place your ceiling fan, you need to consider the following safety measures:
- Clear Open Space:Verify that your ceiling fan blades will have enough room to rotate freely (at least 1.5 feet between the tip of the fan blades and any fixtures) and will not collide with any walls or décor.
- Safe Distance from the Ceiling:Leave a safe distance between the ceiling fan and the ceiling (between 8 – 10 inches) AND the ceiling fan and the floor (between 7 – 9 feet).
- Solid Surrounding Structure:Inspect the ceiling hole and surrounding area to verify there are no damages like chipping, cracking, or water damage.
Removing an Old Light Fixture or Ceiling Fan
IMPORTANT: To avoid serious injury, make sure you shut off your power at the wall switch AND the circuit breaker before attempting to remove your old light fixture or ceiling fan.
- Step 1:Begin by removing the lamp cover or lamp shade. Depending on the model of the ceiling fan or light fixture, you may need to use a screwdriver to detach the lamp shade or light cover.
- Step 2:If it is a ceiling fan, you’ll want to remove the fan blades next, using the screwdriver.
- Step 3:Remove the canopy and motor assembly to get to the mounting bracket.
- Step 4:Verify if the mounting bracket is compatible with your new ceiling fan. You need to make sure it can withstand the weight of your new ceiling fan (while it is moving) or replace it with one that is.
Replacing Your Ceiling Fan Box and Brace
- Step 1:Using a screwdriver, remove any hardware or screws securing the old electrical box to the ceiling.
- Step 2:If you have loosened the electrical box, pull it through the opening. If it remains stuck, you can loosen it further using a piece of wood and a hammer. Tap the electrical box until it is loose enough to pull through the opening.
- Step 3:Wipe away dirt or debris to inspect for any damage in the area. If the ceiling and surrounding area are solid, you may proceed to the next step.
- Step 4:Insert your support brace through the opening in the ceiling and position it between two joists. Twist the brace until it tightens into place.
- Step 5:Take your saddle bracket and slip it through the opening until it hangs over the fan brace.
- Step 6:Pull your home’s wiring through the ceiling fan box and gently push the ceiling fan box into the ceiling opening.
- Step 7:Secure the ceiling fan box to the saddle bracket using the nuts and a nut driver.
Installing Your New Ceiling Fan
Now that you have successfully prepared the ceiling area and ceiling fan electrical box, it is time to install your brand-new ceiling fan!
*Make sure the power is turned off at the breaker and there is no electricity flowing through the ceiling wiring.
**For steps specific to your ceiling fan make and model, always refer to the installation guide provided by your ceiling fan manufacturer.
-
Attaching the Blades
- From your ceiling fan packaging, retrieve the motor hub, the blade brackets, the fan blades, and the corresponding screws.
- Place the motor hub upside down and attach the fan blade brackets using the correct screws.
- After you have installed all five fan blade brackets, flip the motor hub right side up.
- Attach a blade to each fan blade bracket and secure it using the appropriate screws.
- To proceed to the next step, you should have five fan blade brackets attached to the motor hub and a fan blade attached to each blade bracket.
-
Installing the LED Light Kit
- Retrieve your LED light kit from your ceiling fan packaging.
- Place your motor hub upside down and attach the LED light kit to the light plate using the correct screws.
- Plug the LED light cable into the motor hub.
-
Attaching the Downrod
- Retrieve your 6-inch downrod from your ceiling fan packaging. (If you require assistance choosing your ideal downrod length, head over to our How to Choose the Right Size Ceiling Fan post for a helpful diagram.)
- Remove the screw fixed onto the motor hub. If you’re going to be using a safety cable or chain, you will use this screw to secure it to the motor hub.
- Your downrod should be assembled in the following order from bottom to top: wiring cover, canopy, and downrod. Make sure to pull the wiring cables through each component in the correct order.
- Hold the wiring and safety cables at the end of the downrod as you lower the downrod into the motor hub.
- Secure the downrod to the motor hub using the appropriate screws and washers in opposite directions from each other.
-
Installing the Mounting Bracket
- Retrieve your ceiling fan mounting bracket from your packaging.
- Align the mounting bracket holes to the holes of your ceiling fan box.
- Secure the mounting bracket to the ceiling fan box using the correct screws.
*Note: You can also attach the mounting bracket directly to a wooden beam after you test that the tensile strength of the wooden beam is at least 30 kg to withstand your ceiling fan. If you have a concrete ceiling, you can also attach the bracket using the appropriate screws for concrete (not supplied). If you have an angled or vaulted ceiling, you will require a longer downrod and an angled mounting kit if your ceiling slope is greater than 25 degrees.
-
Hanging the Ceiling Fan & Attaching the Light Cover
IMPORTANT: Before hanging your ceiling fan, review all safety precautions again; verify that the ceiling fan box is compatible with the weight of your ceiling fan, all connections are tight, and the electricity is turned off before wiring.
- Lift your ceiling fan and hang it on the mounting bracket so that the pivot ball on the downrod matches up with the slot on the mounting bracket and locks into place.
- You may have to rotate the fan until it locks into place.
- To avoid serious injury, make sure the pivot ball has locked into place before releasing the ceiling fan.
- After successfully hanging the fan, take your light cover from your packaging and align it with the slot of the LED light panel.
- Turn the light cover clockwise until it locks into place. *To avoid serious injury once the fan is moving, make sure the light cover is tight and secured.
-
Installing the Power Adapter & Wiring the Fan
- Place the AC adapter inside the mounting bracket (on the flat side) and push it through.
- Connect the DC output wire with the wire from the motor that comes through the downrod.
- Connect the power adapter and power supply wires:
- The Green or Yellow wire from the bracket connects with the ground wire from the power supply. Use a wire cap to secure the wires together and tuck them inside the ceiling.
- The White wire from the AC adapter connects to the Neutral wire from the power supply. Use a wire cap to secure the wires together.
- The Black wire from the AC adapter connects to the Live wire from the power supply. Use a wire cap to secure the wires together.
-
Raising the Canopy
Depending on your ceiling fan model, securing the canopy to the mounting bracket will differ slightly from fan to fan. It is always a good idea to refer to your installation manual for instructions specific to your ceiling fan model.
If you have a black Smafan Smart fan:
- Carefully tuck all the wires into the canopy.
- Slide the canopy upwards and towards the mounting bracket and align the screw holes with the mounting bracket holes.
- Secure the canopy to the mounting bracket using the screws provided.
If you have a different color Smafan Smart fan:
- Make sure all the wires are tucked away into the canopy.
- Raise the canopy toward the mounting bracket.
- Rotate and twist the canopy until it locks into place.
Congratulations: you have successfully installed your ceiling fan! The final step is to turn on your power and test the fan functions. Make sure you can adjust between fan speeds, light colors, light brightness, and more using the remote control, smartphone control, and even your smart home devices.
Shop our Premium Ceiling Fans and Ceiling fan parts & accessories for quality you can feel, customer service you can rely on, and like always, a Smarter way to cool.


